(Just came out of the box!)
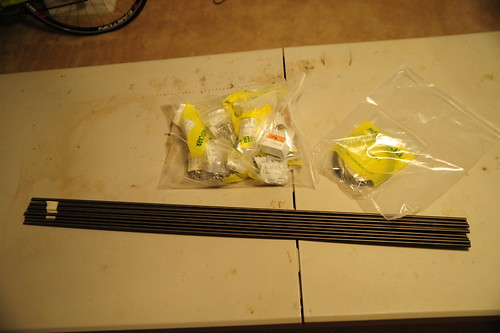
Okay! Making a bit more progress with the build! Over the past couple days I've gotten in all the belts and metal parts from McMaster-Carr, the smooth rod from SmallParts, and the bearings from VXB.
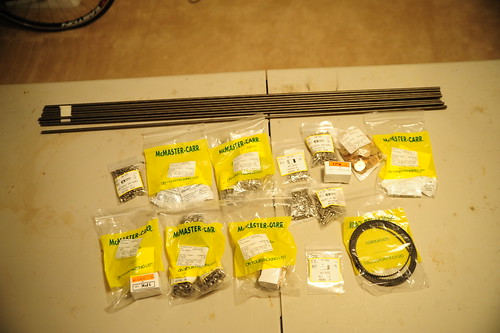
(Everything laid out)
I've started cutting down the studding, had to go get a new hacksaw to cut through it. I should also mention that for sheer fun, I've decided to get stainless steel (18-8) wherever possible. All the bolts/nuts/washers/studding/smooth rod are all stainless steel.
The best way I've found to mark something odd like studding is to use tape of some sort. Masking tape is cheap and does a great job, since it has a perfectly smooth edge. Just line it up at the measurement and wrap it around the rod.. now you've got a clean, straight line to cut. I also started putting little marks on the side of the tape I'm supposed to cut on to help remind me.
I also went through the parts doc and converted the mm lengths over to inches, so if I do post it back up to the wiki (which I'm pretty sure I am after I compile all the edits) it'll have imperial/metric measurements for things like length. Some of them aren't super exact, but I rounded to the nearest 16th on things that don't matter like the frame studding, and for more accurate parts, they actually turned out to be very close to whole inch measurements anyway. We'll see when I get the stainless rod home tonight and try to cut that..

(Measure 5 times! Stainless studding isn't cheap!)
For cutting, I used a cheap miter box on a cheap table, a nice hacksaw and clamps and wood.. I basically wedged the rod in between the wood and the box to help hold things in place while I cut them.. the new hacksaw works great! I decided to go with a less-aggressive 24T blade to make the cuts a bit smoother, and it really did the trick. After each cut, all I'm doing is filing the end down a bit with a bastard cut file (good for rough edges like these) and running a die over them real quick if they need the threads fixed. Nuts thread right on!
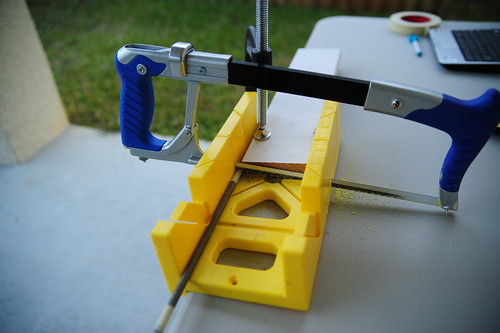
(Cutting jig)
So after it was all said and done, I cut 7 pieces of studding.
I've got
Here's a photo of how I laid out my cuts. Everything should be here for the studding, and if it's not, I'll either find out from someone telling me, or when I go to assemble it! Hoping I can start test-fitting the frame pieces together tonight..

(How I made my cuts.. Click on it for a much more visible size)
No comments:
Post a Comment